
Connect to ChatGPT
Connect PriceLabs MCP to ChatGPT using a custom client. This guide walks you through creating the custom connector in PriceLabs, configuring OAuth in ChatGPT, and completing the authorization flow.
Step 1 - Get your callback URL from ChatGPT
Before creating the custom client in PriceLabs, you need the callback URL that ChatGPT will use for the OAuth flow.
1. Log into ChatGPT
Go to chatgpt.com and sign in to your account.
2. Add a new plugin
Navigate to the Plugins section and click the + icon to add a new plugin.
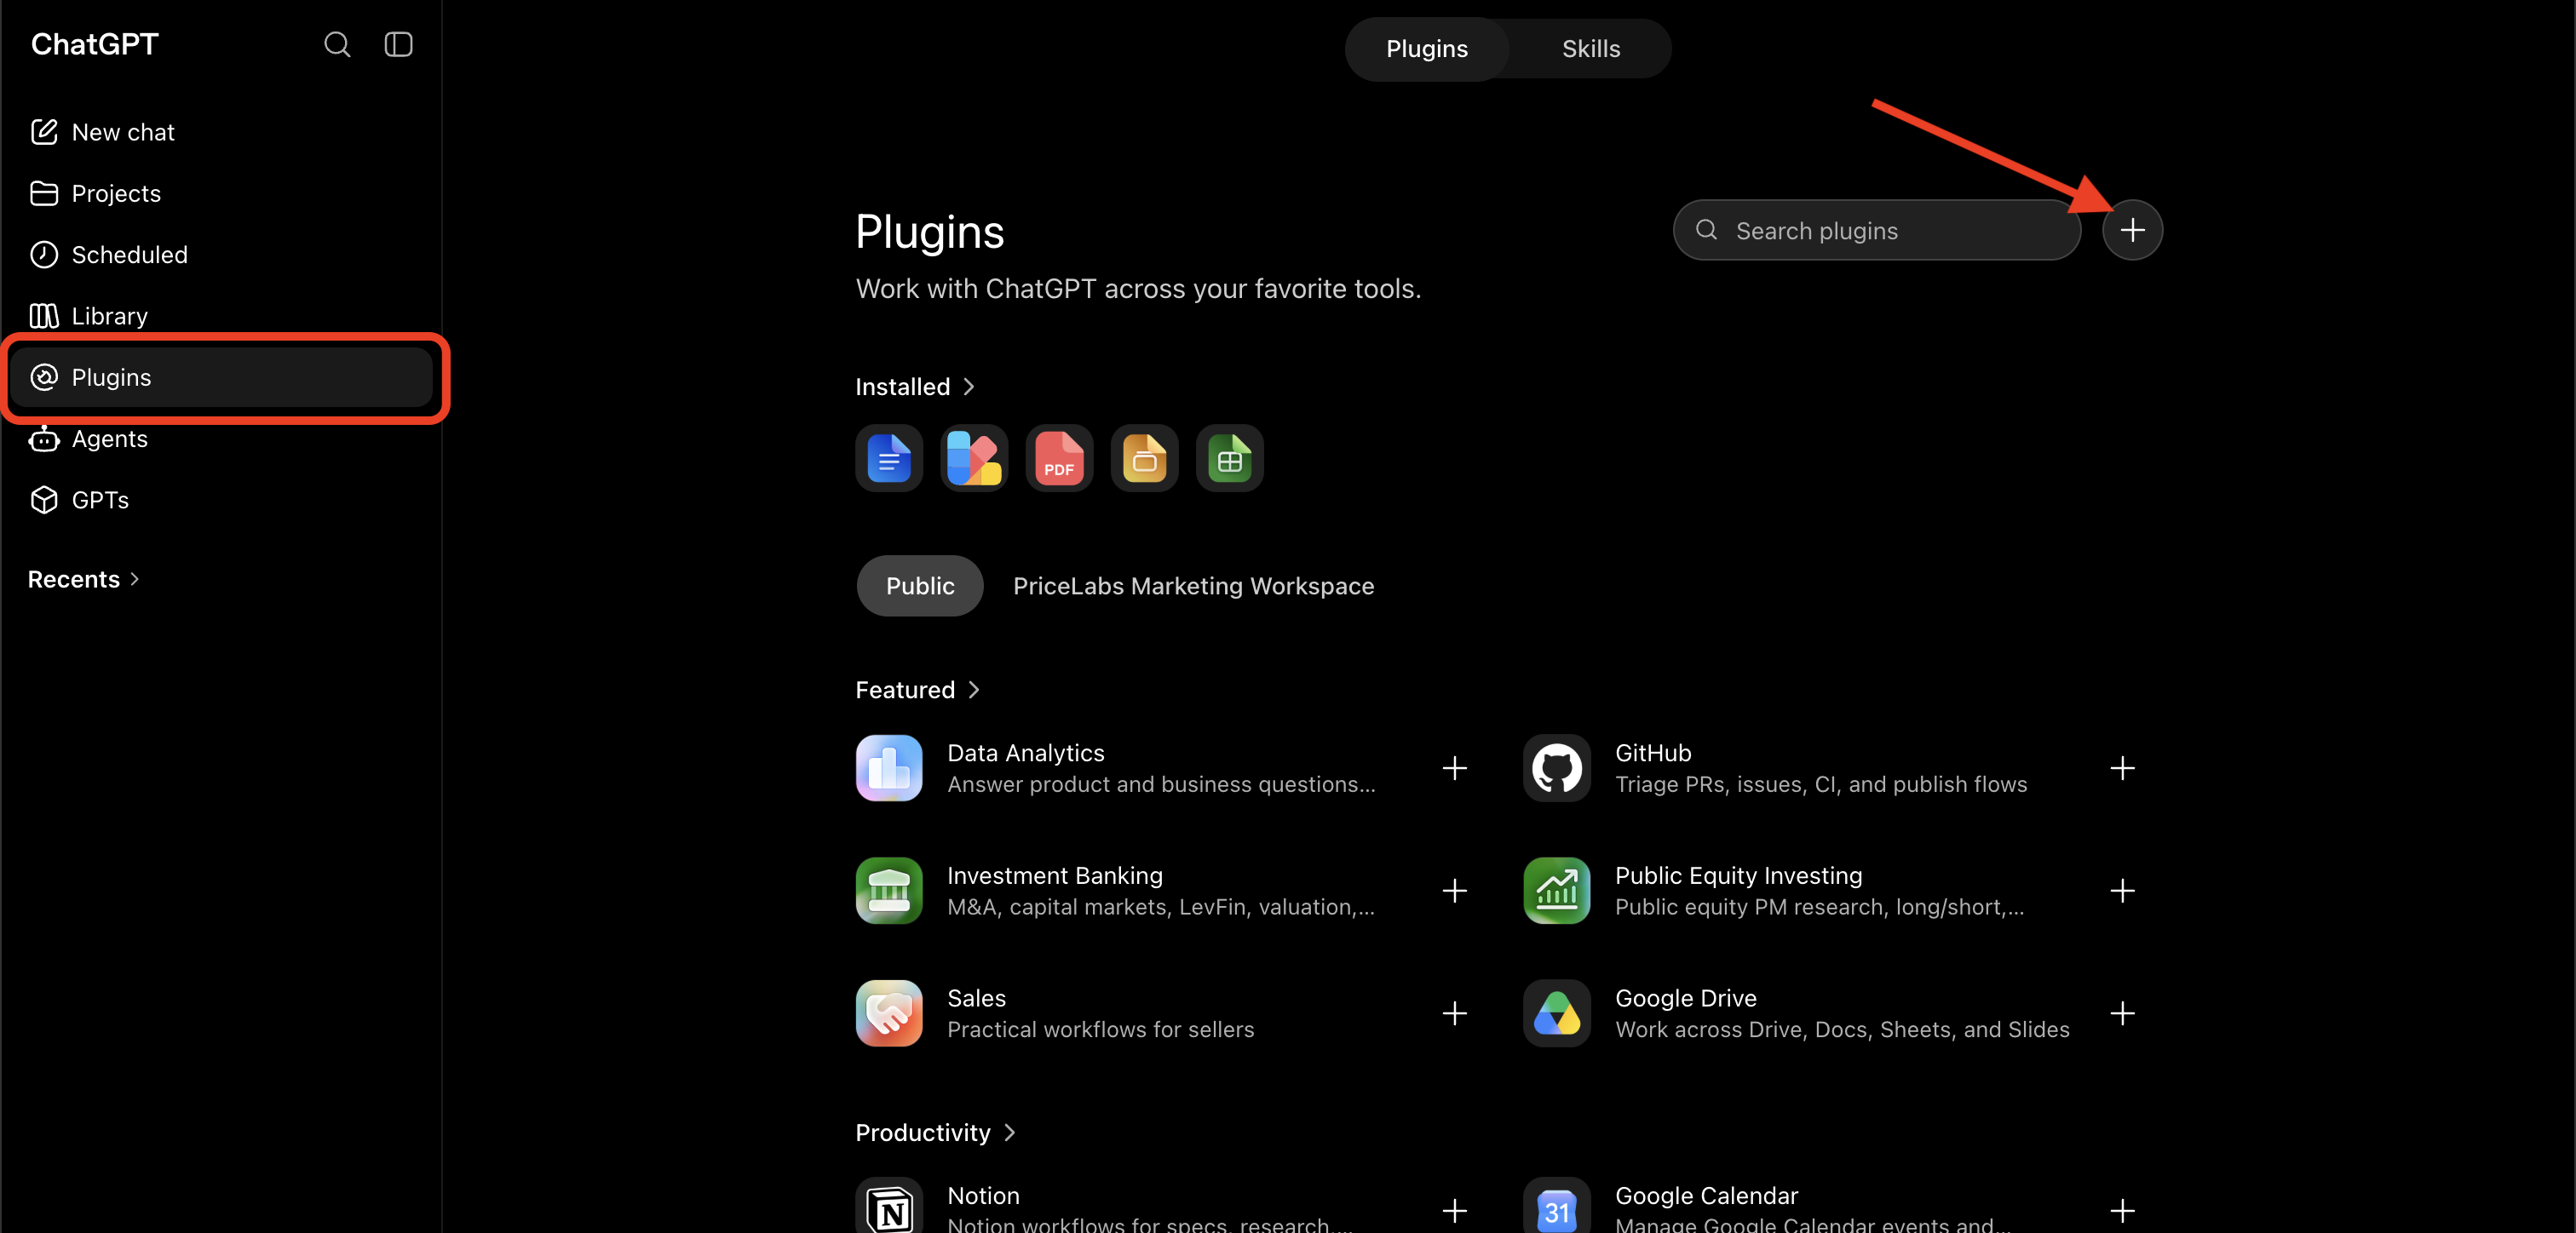
⚠️ Can't see the + icon? Enable Developer Mode first
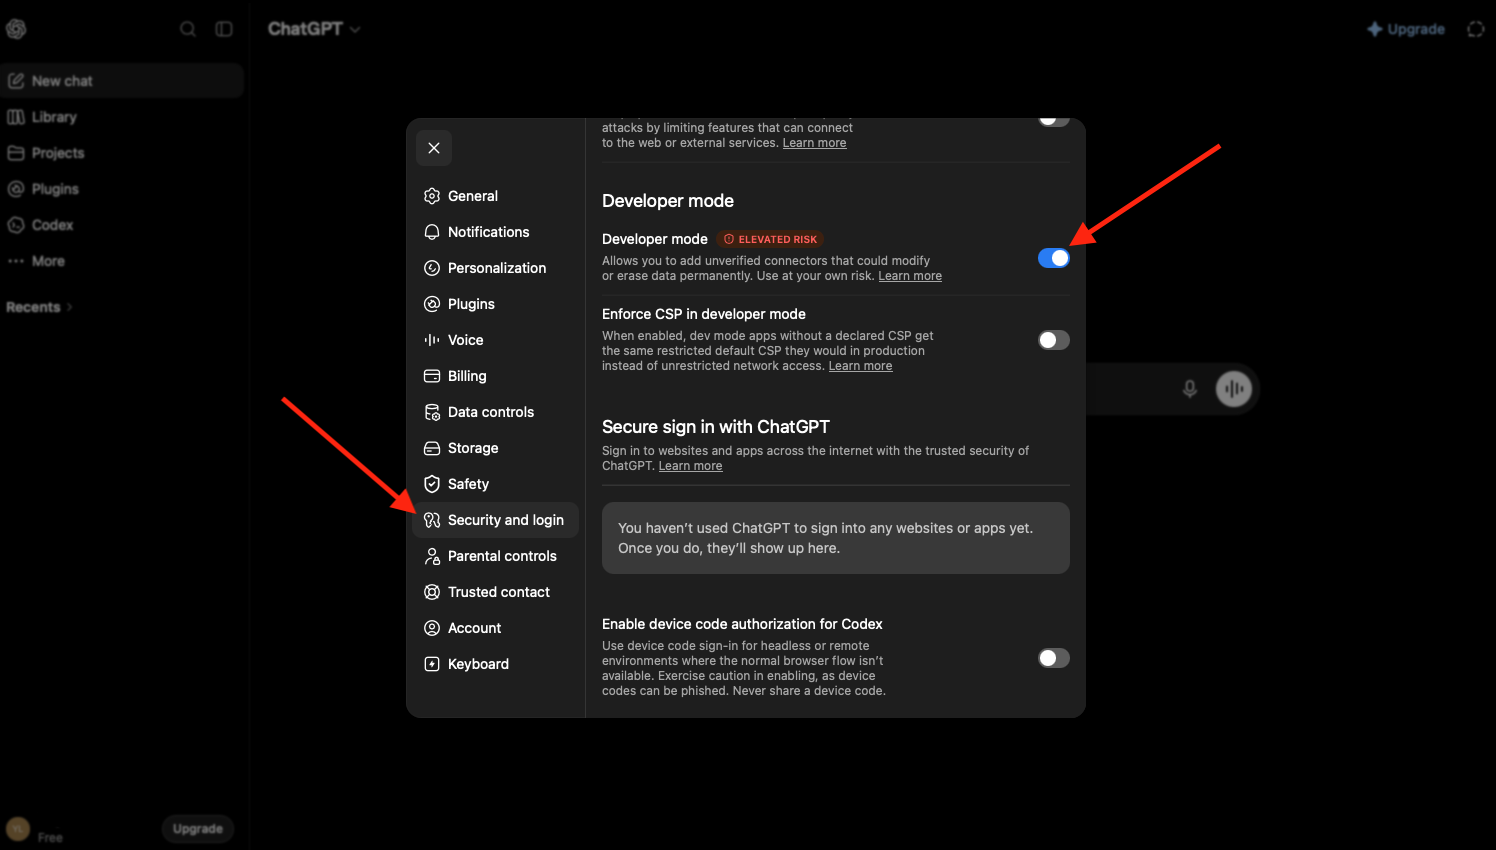
If the + icon is not visible on the Plugins page, you need to enable Developer Mode first:
- In ChatGPT, go to Settings → Security & Login.
- Scroll down to Developer Mode.
- Toggle it on.
- Return to the Plugins page — the + icon should now appear.
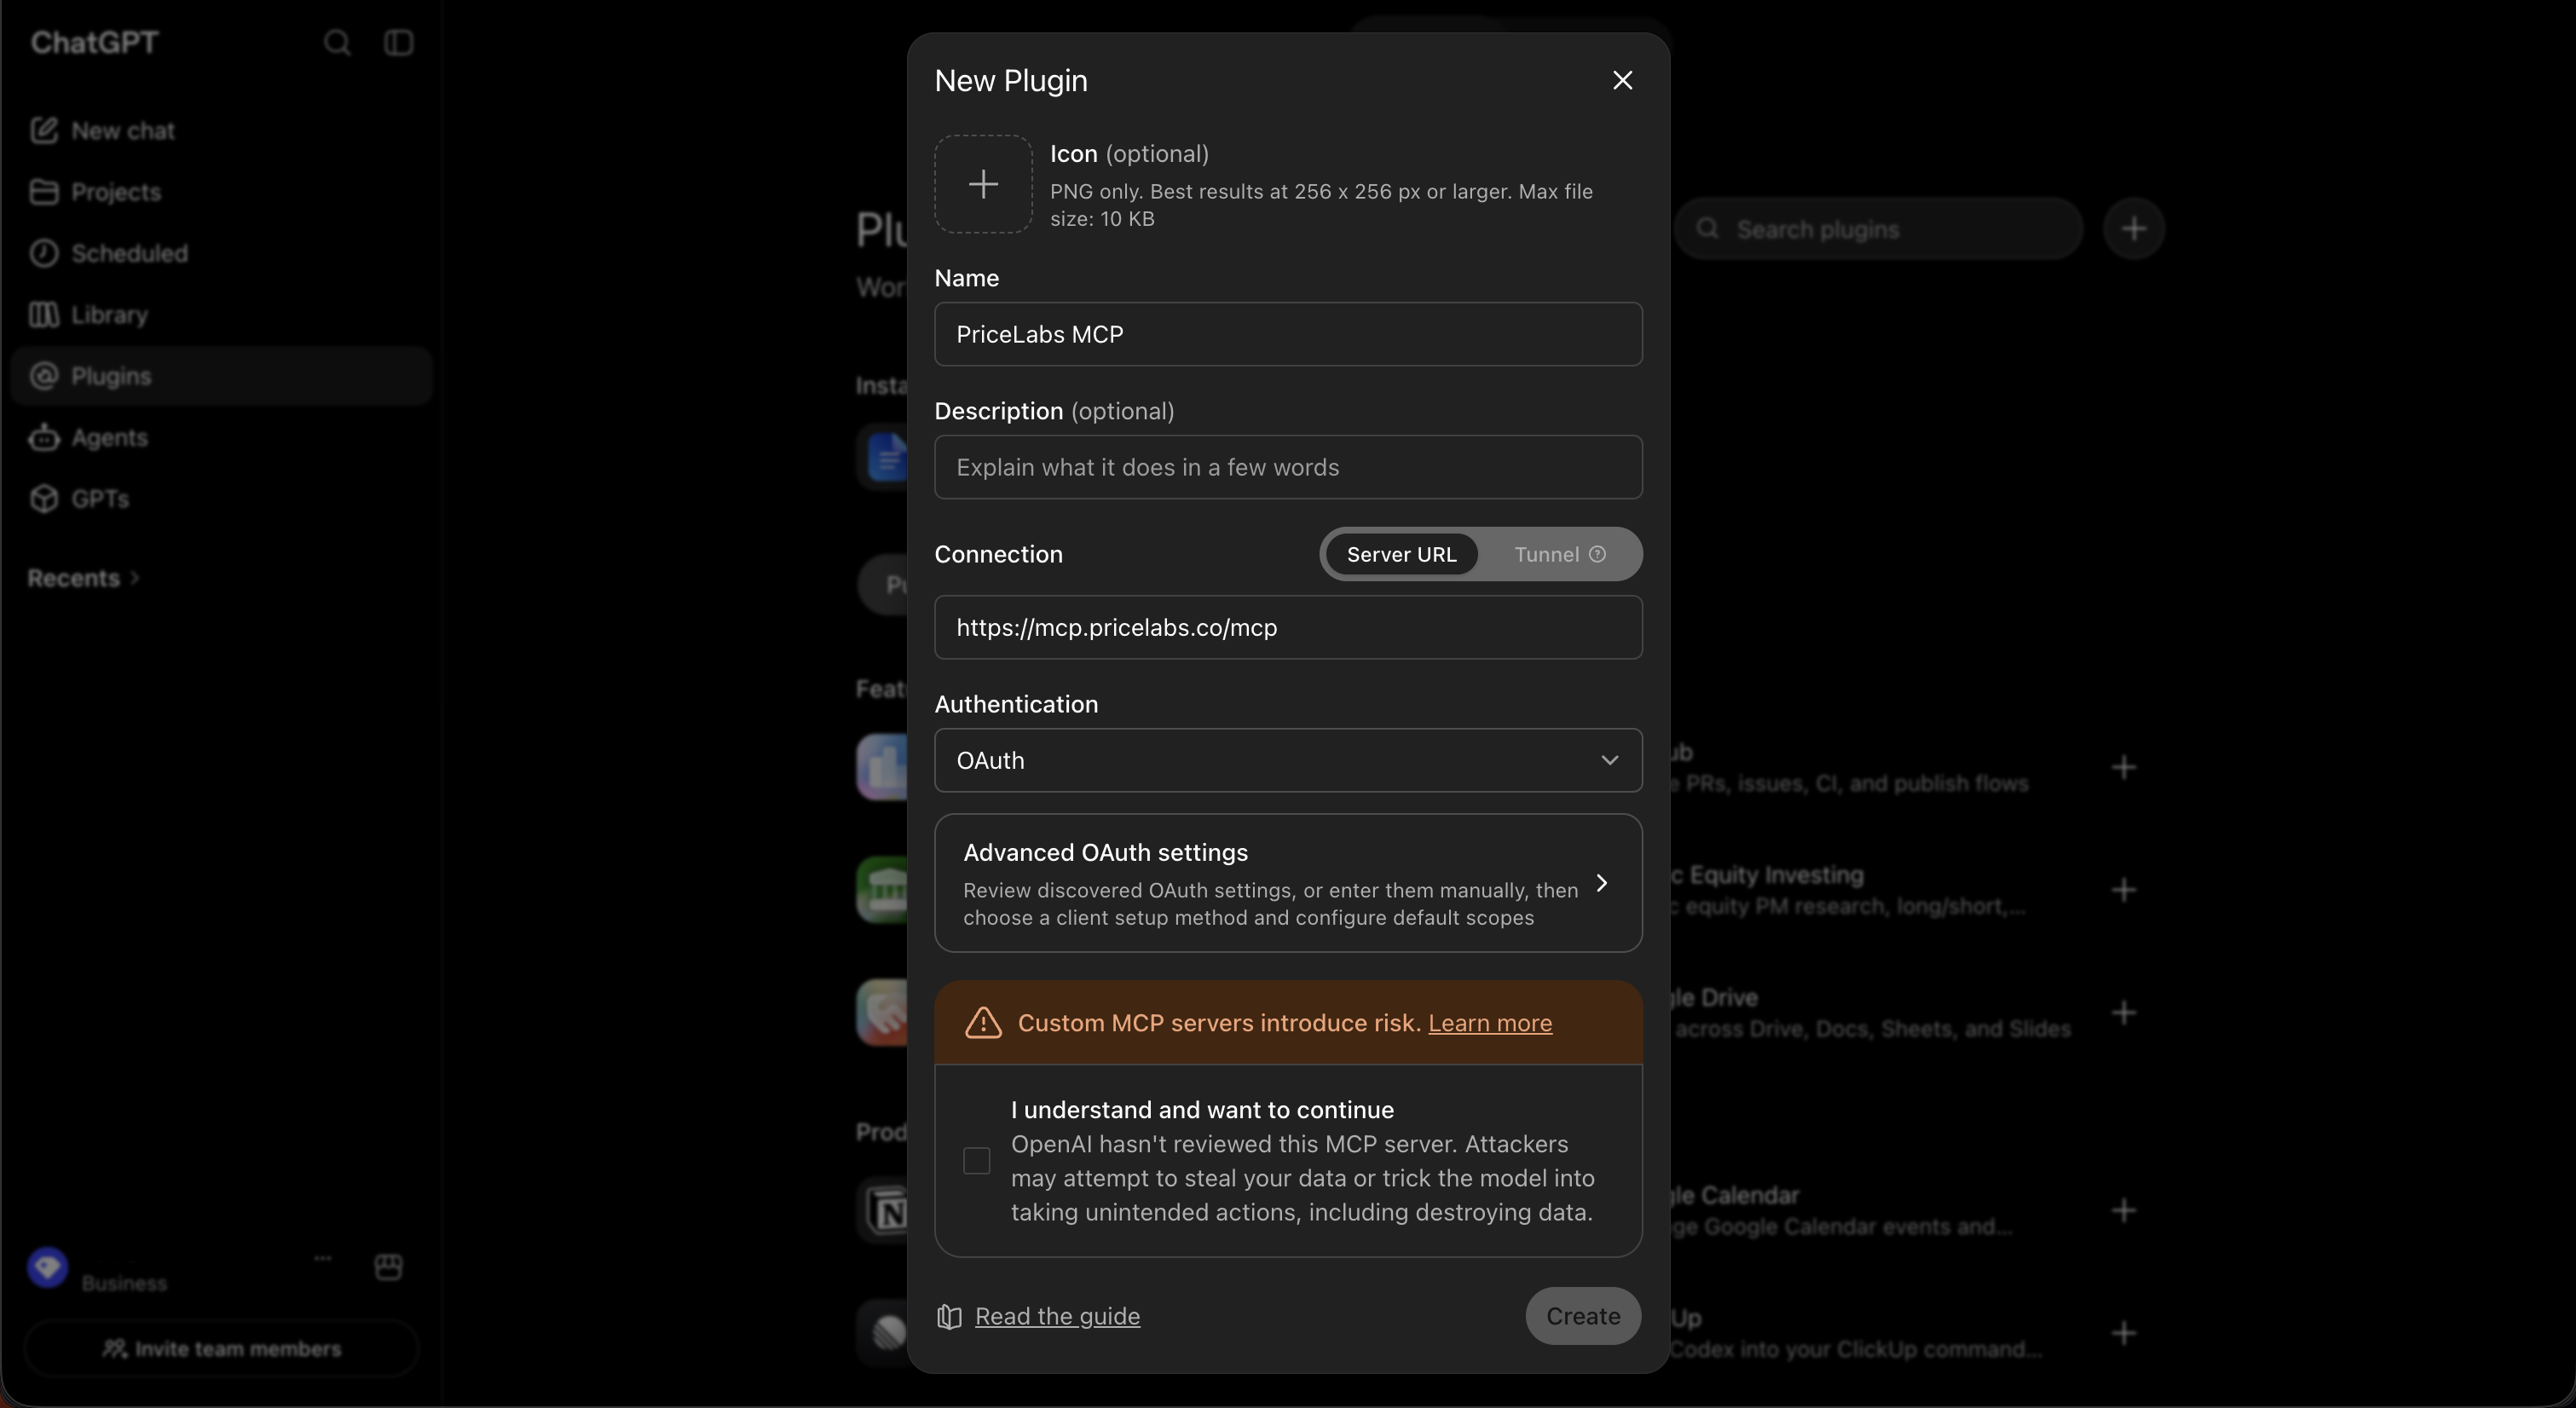
3. Enter plugin details
Fill in the following:
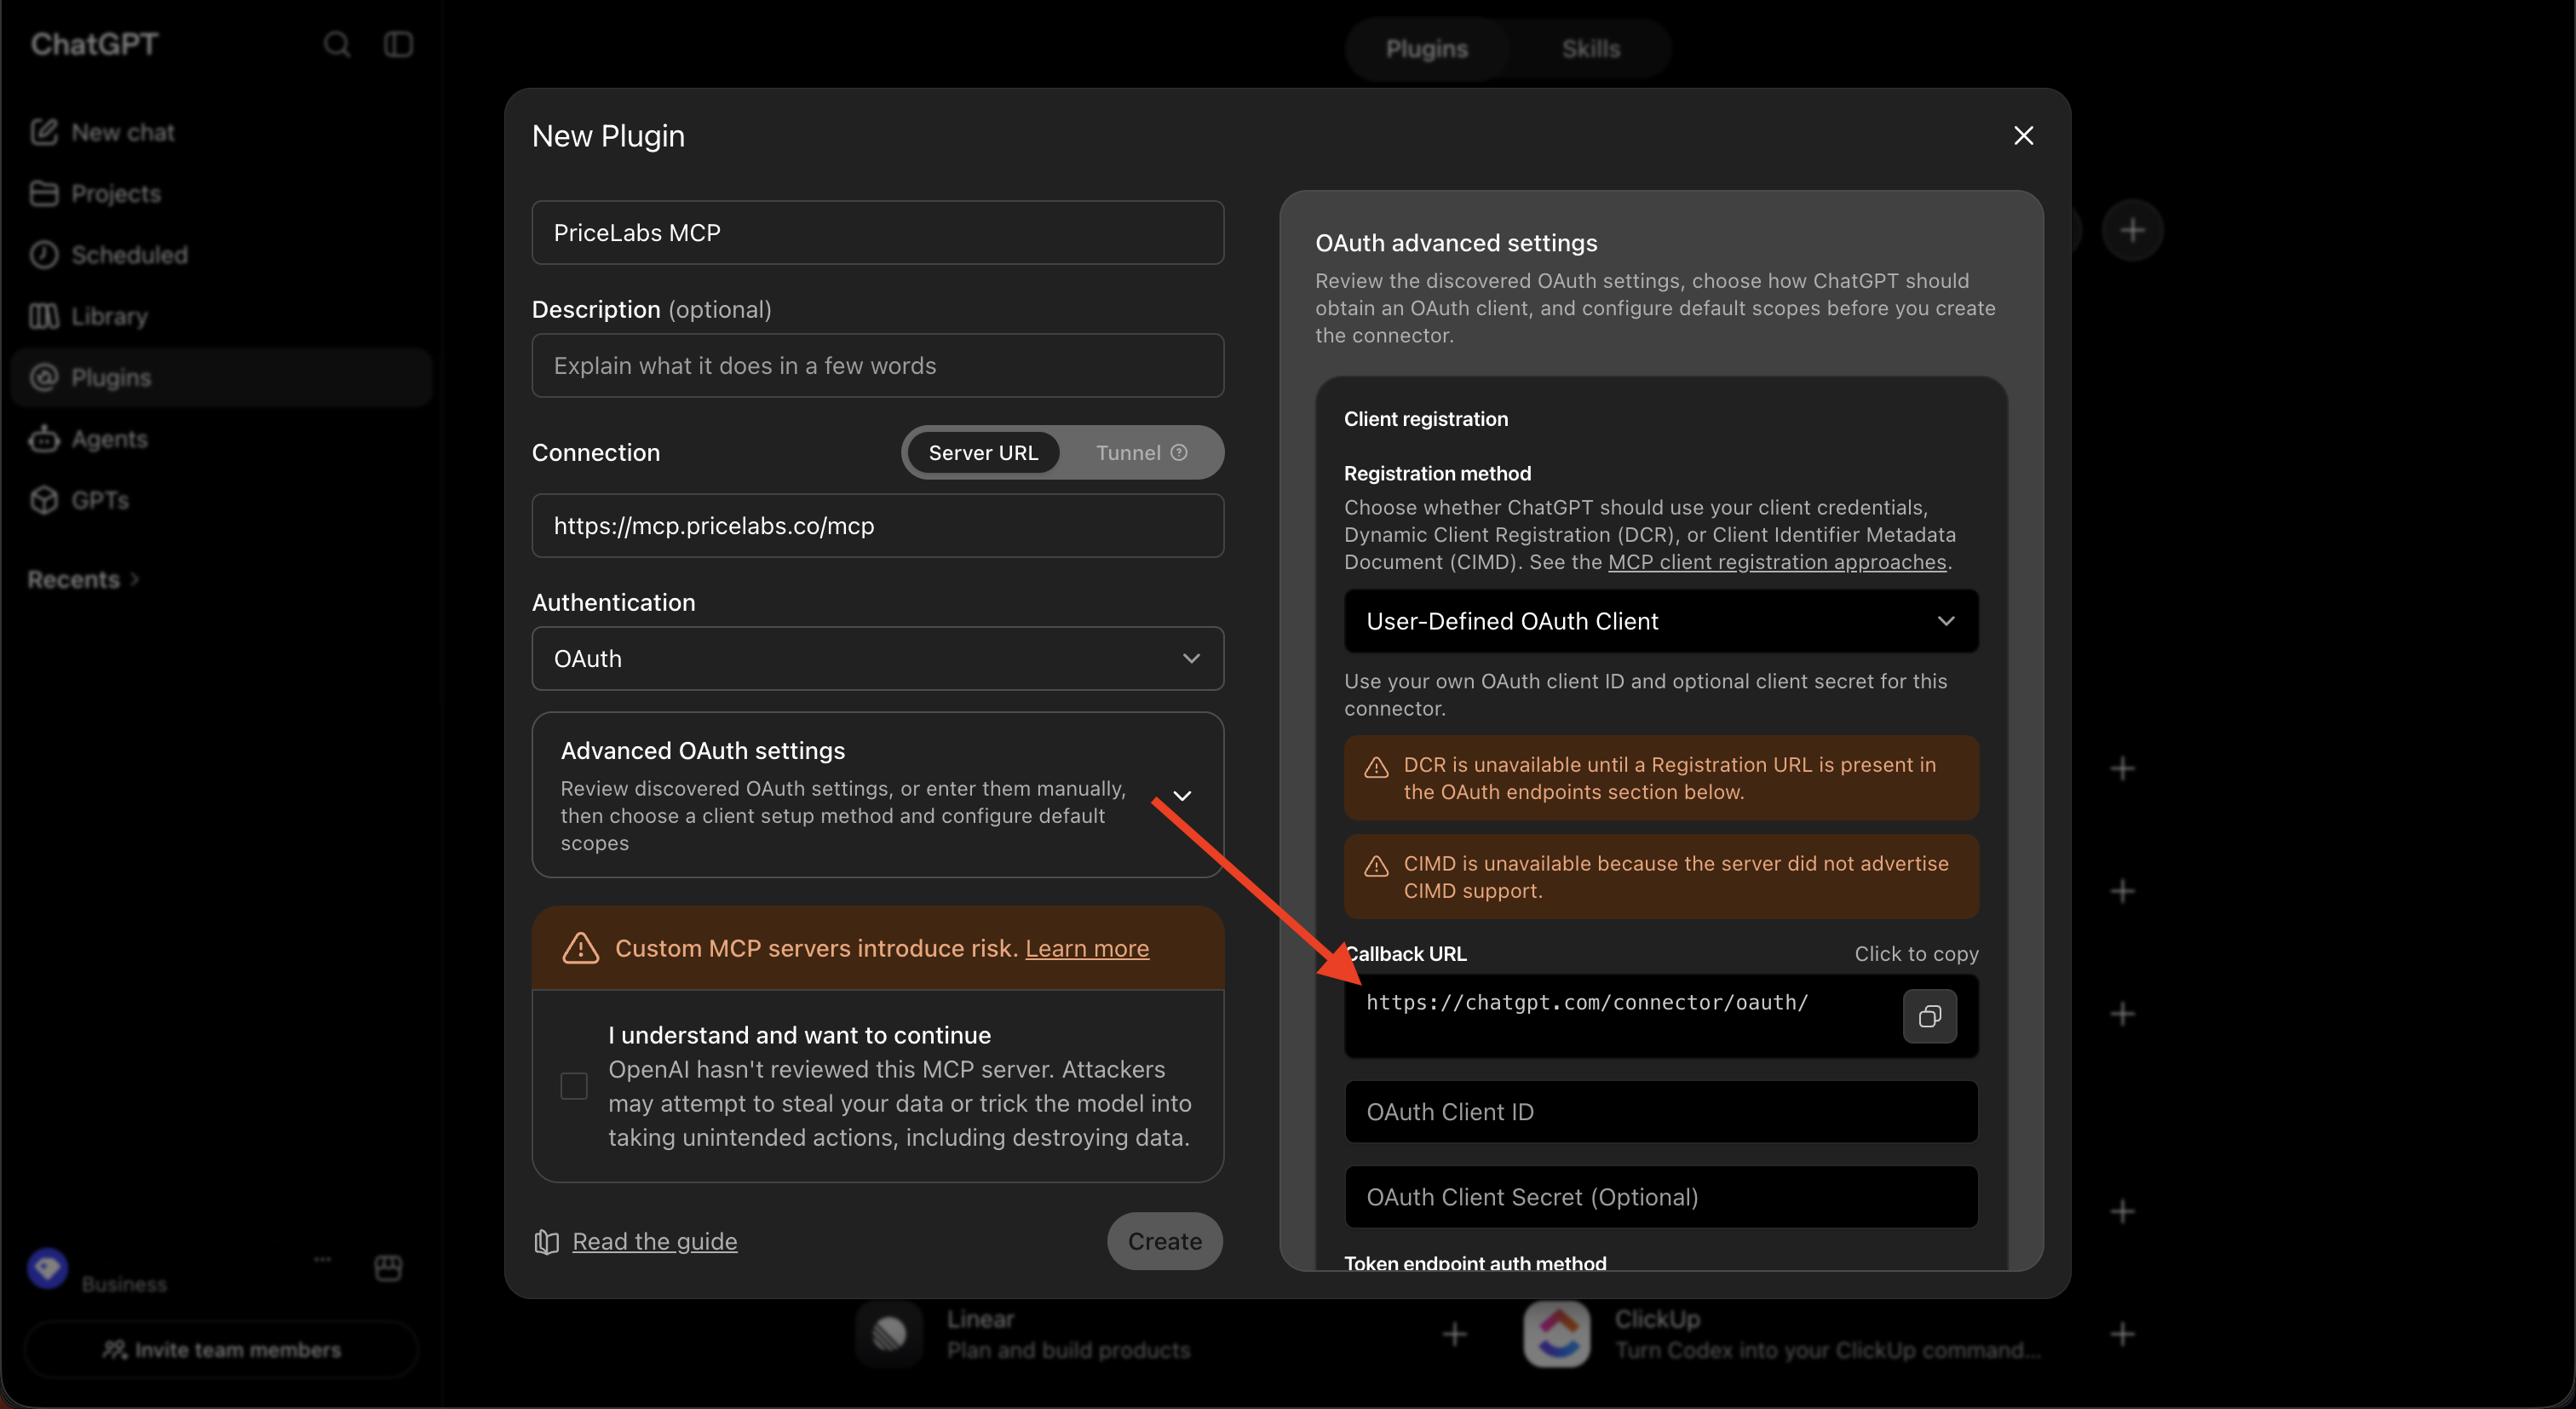
4. Get your callback URL
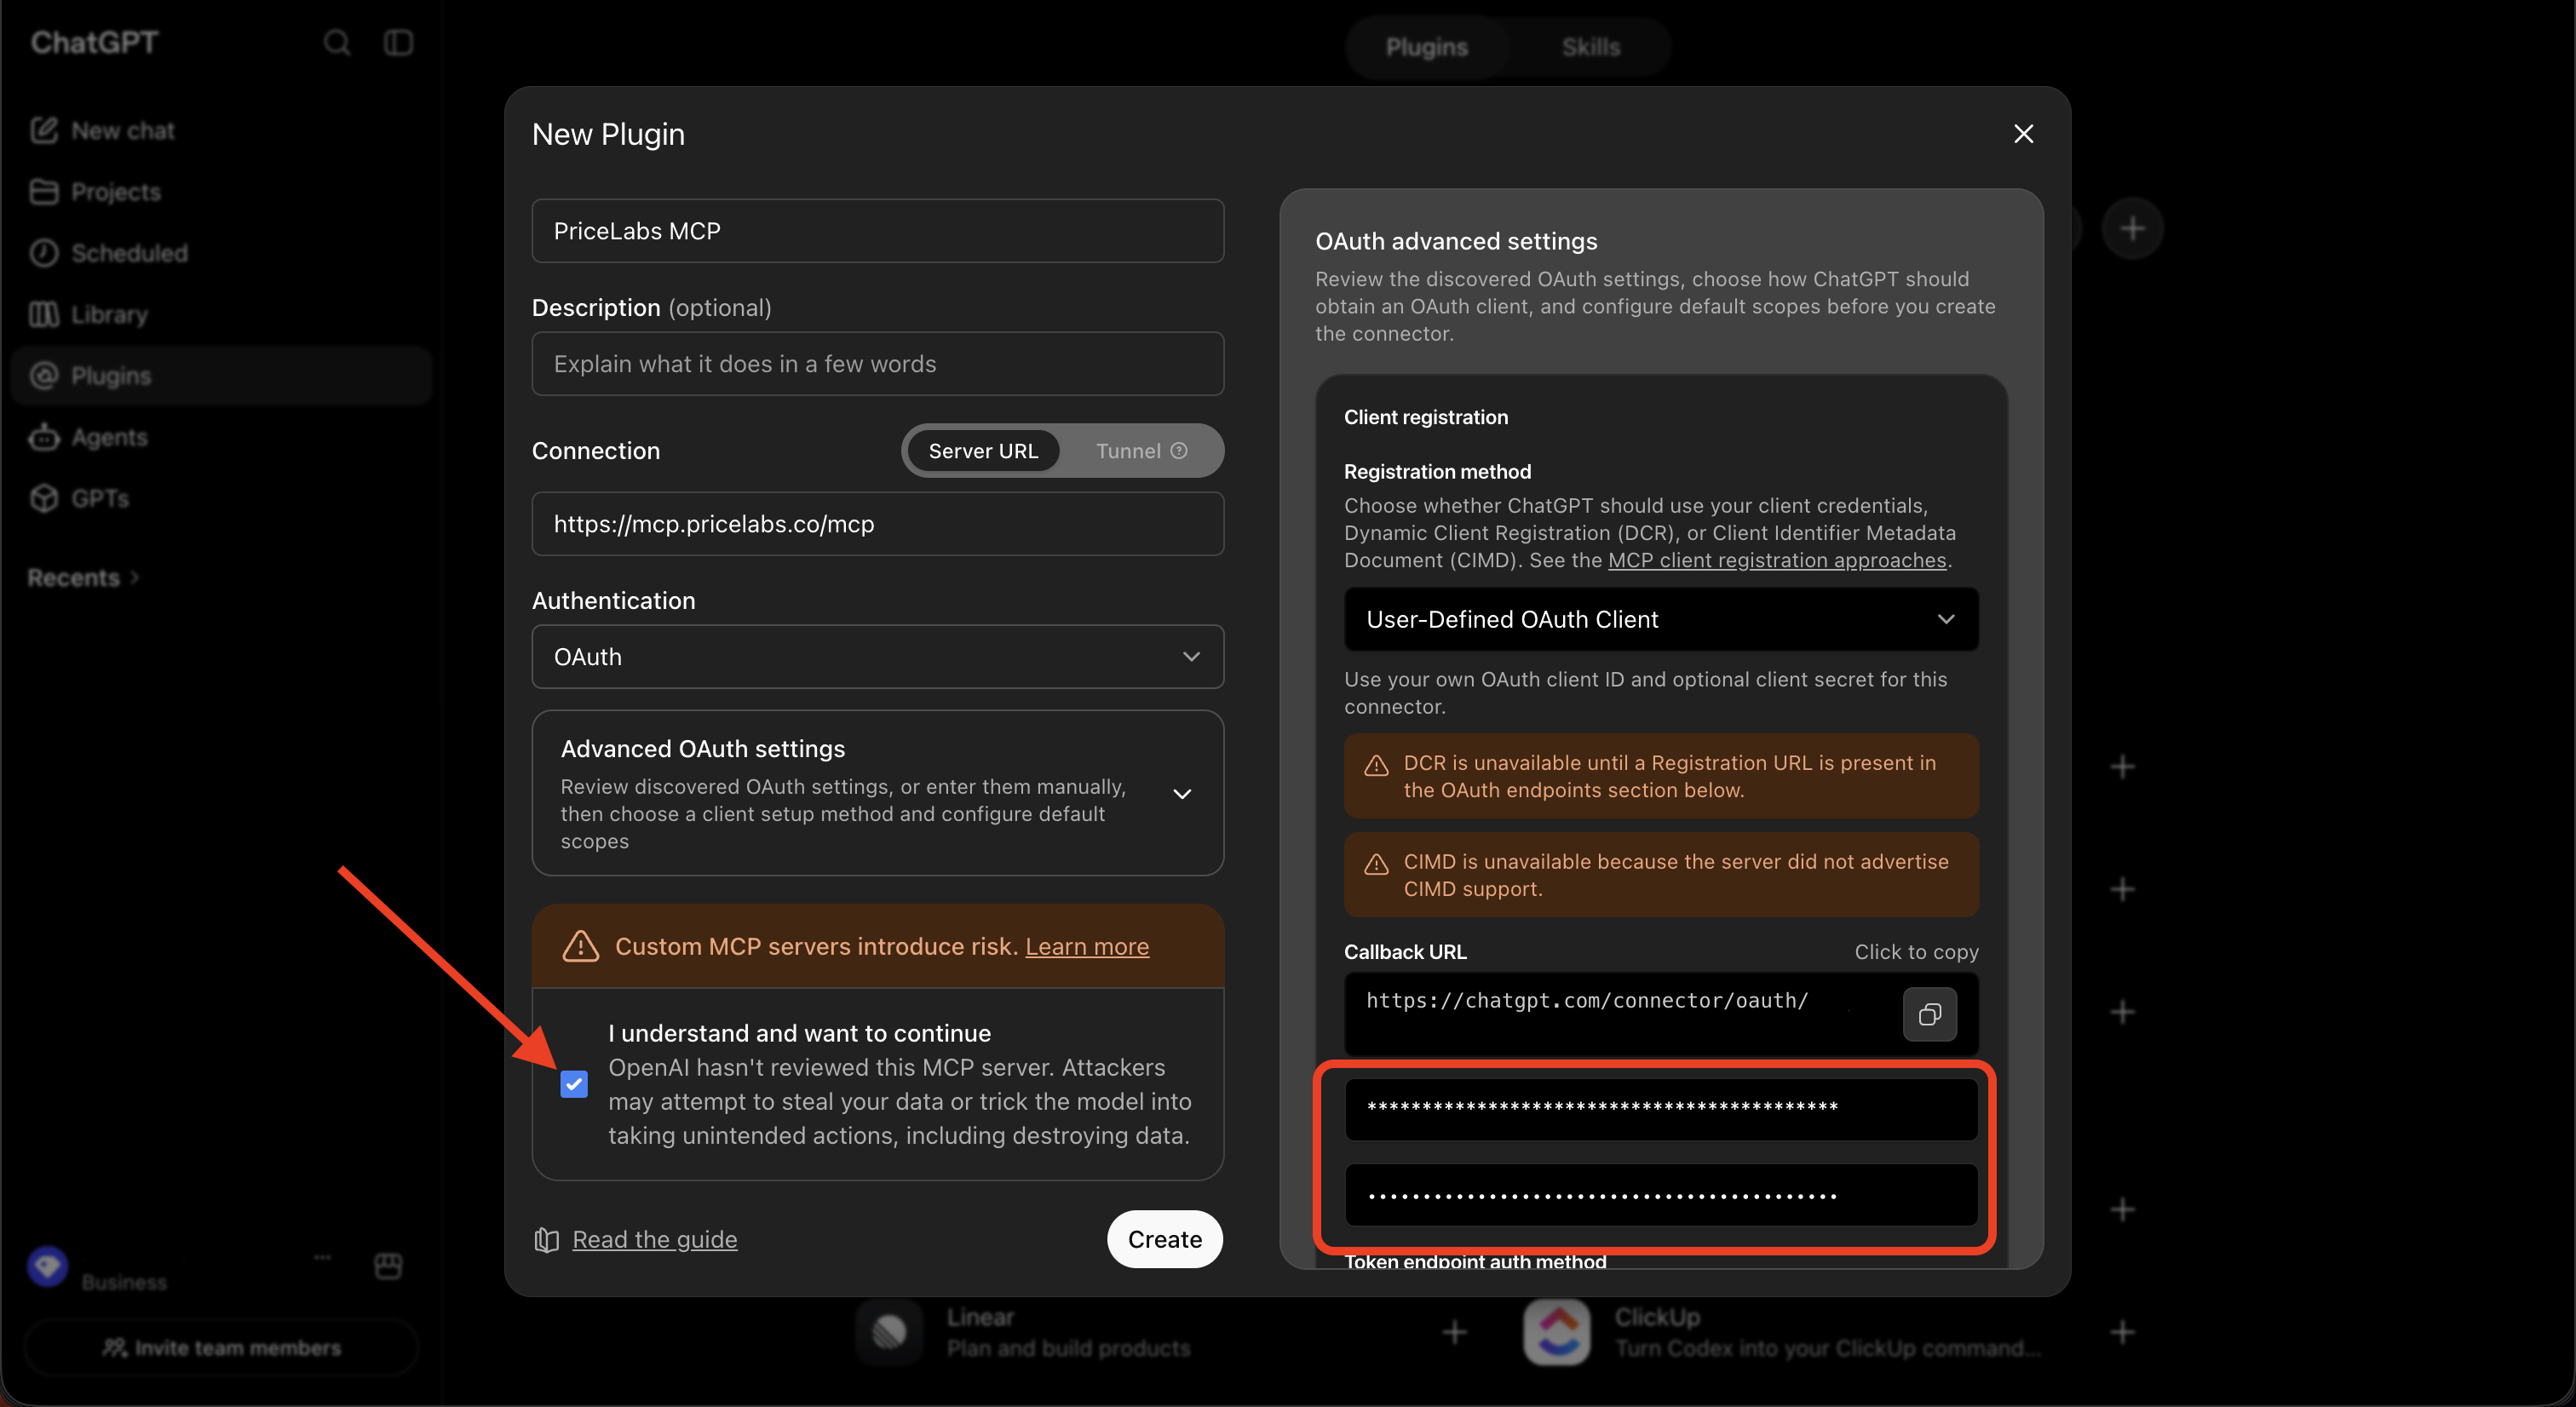
Click on Advanced OAuth Settings. ChatGPT will display a Callback URL specific to your account. Copy this URL — you will need it in the next step.
Step 2 - Create a custom client in PriceLabs
1. Open MCP settings
Sign in to PriceLabs and navigate to Account Settings → AI Connector (MCP).
2. Add a custom connector
In the Custom Connectors section, click + Add Custom Connector.
3. Enter details
Click Add Custom Client to create the custom client.
4. Save your credentials
PriceLabs will display a Client ID and Client Secret. Copy both immediately.
The Client Secret is shown only once and cannot be retrieved again. Store both values securely before closing the dialog.
For detailed steps on creating the custom client, see Custom Clients → Add a custom client.
Step 3 - Complete OAuth setup in ChatGPT
1. Enter credentials and create the plugin
Go back to the ChatGPT plugin configuration (Advanced OAuth Settings). Enter the Client ID and Client Secret you copied from PriceLabs, click “I understand and want to continue” to acknowledge the OAuth configuration, then click Create to finalize the plugin.
2. Authorize with PriceLabs
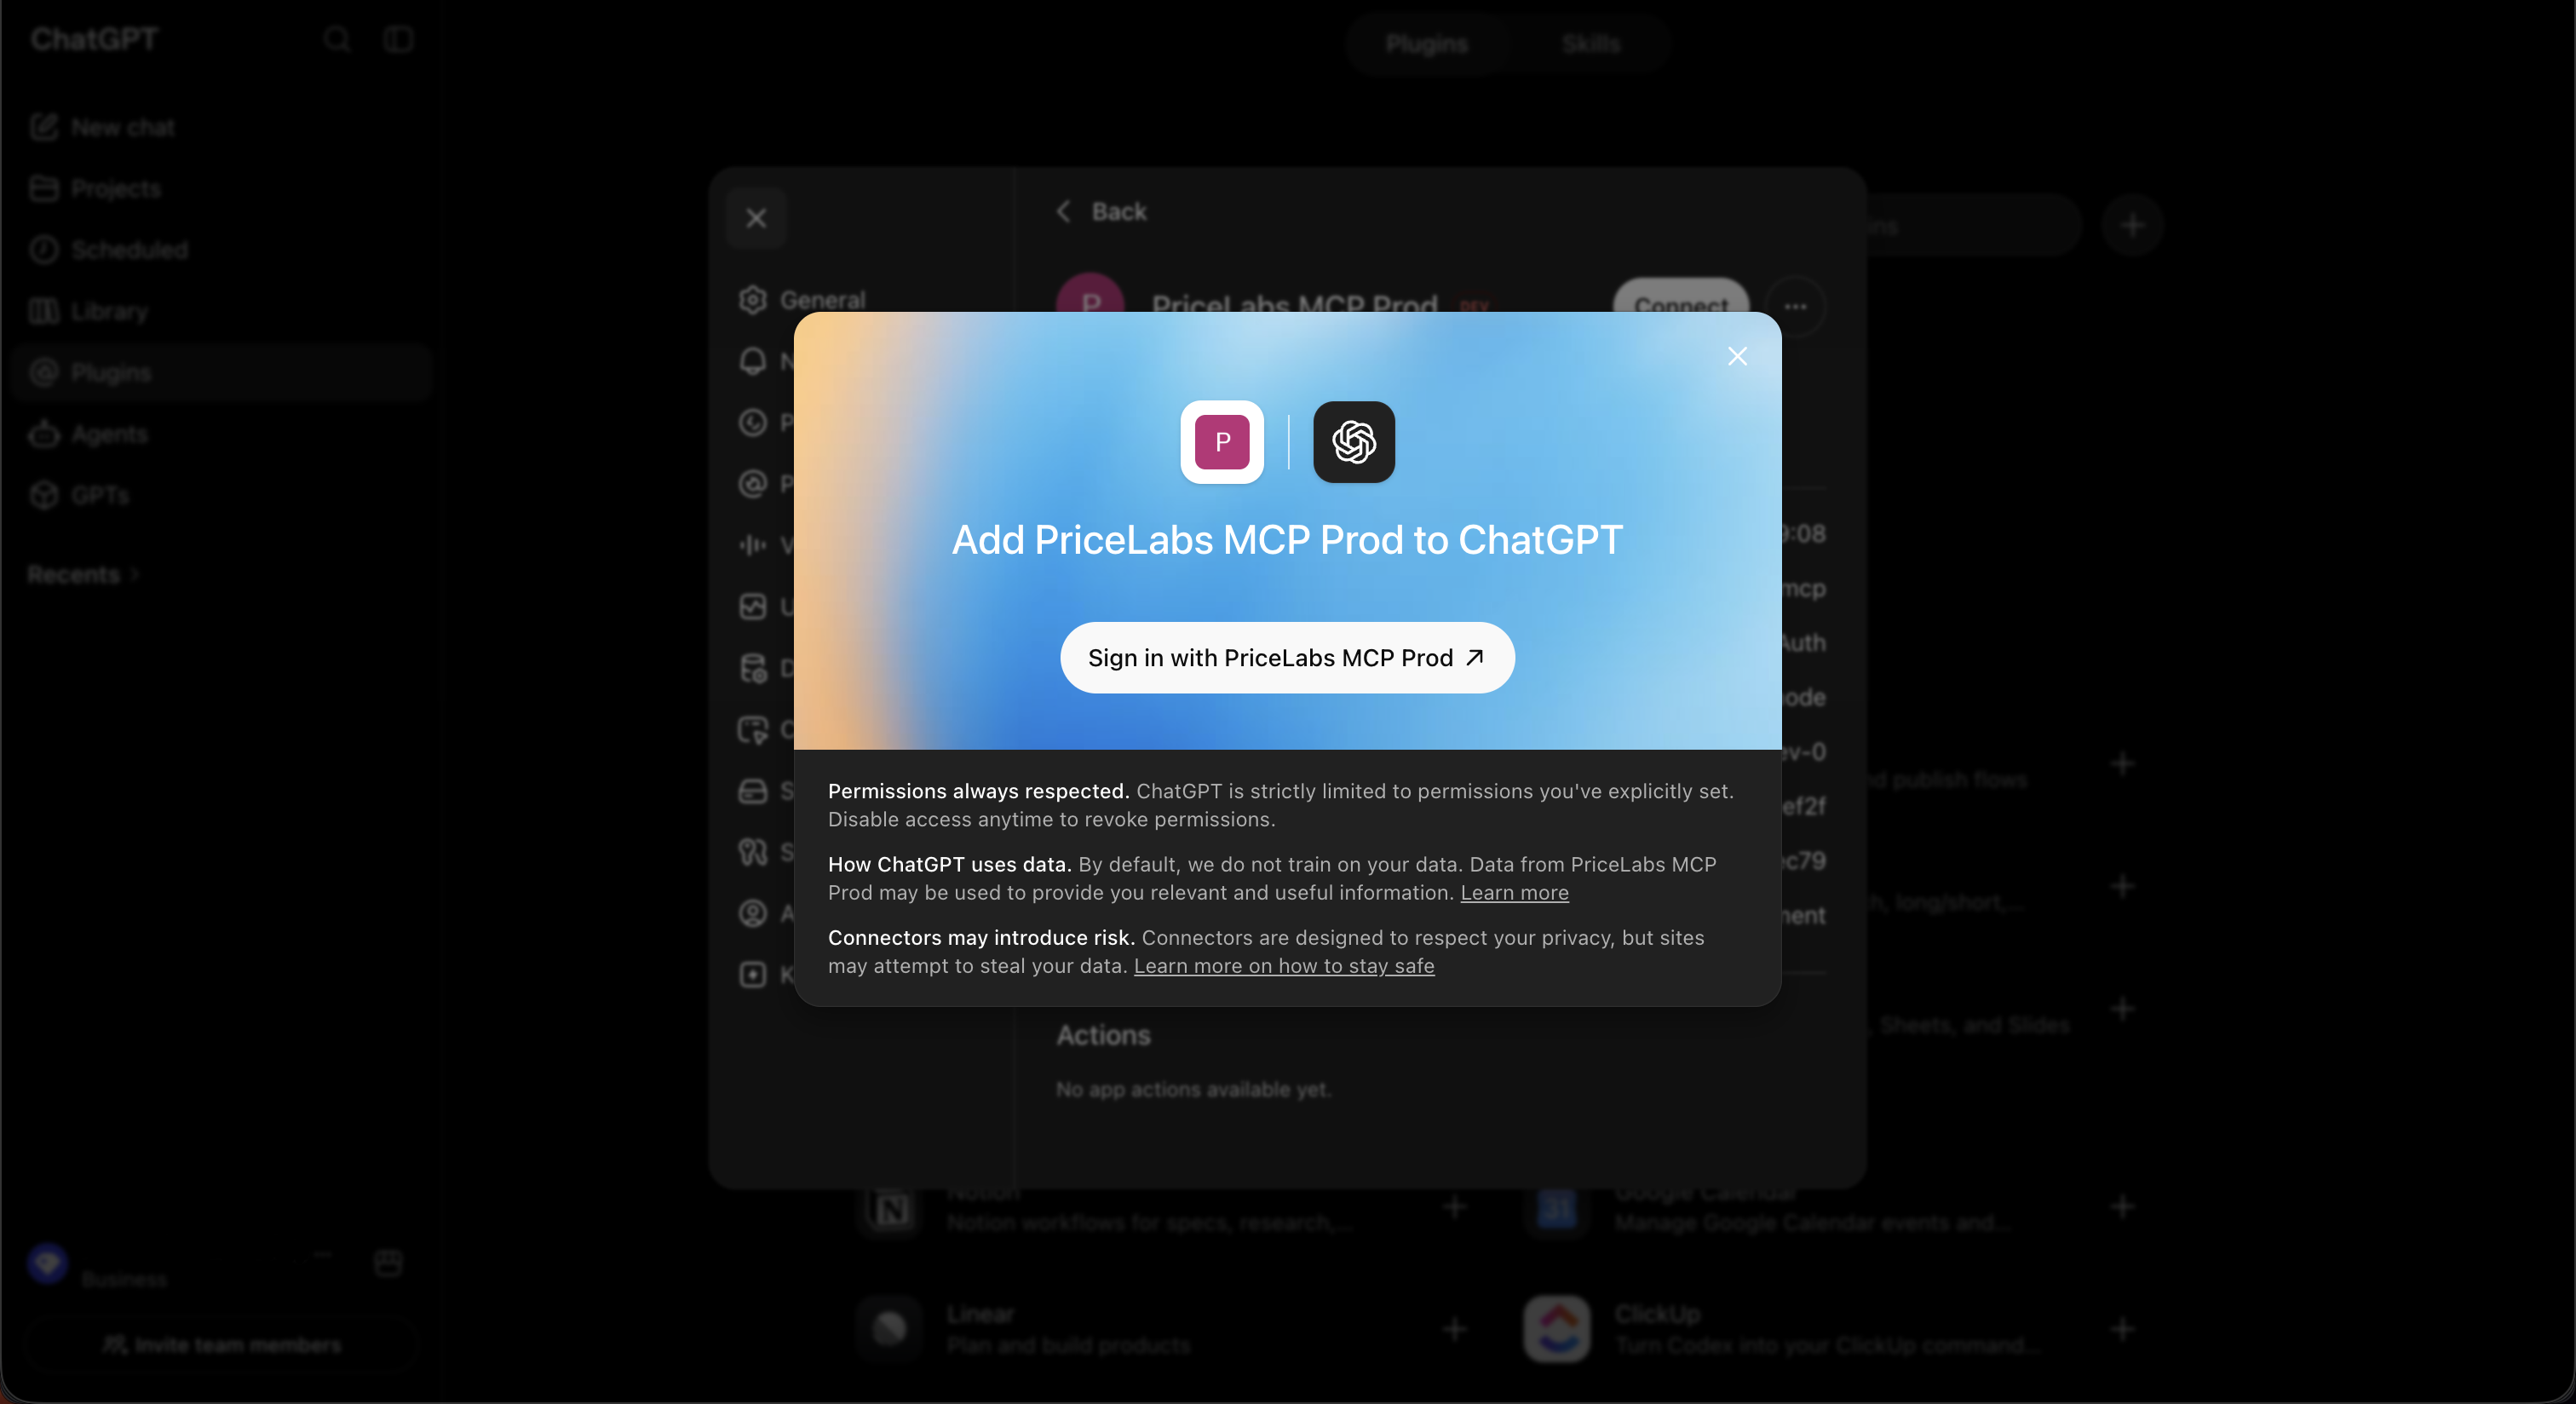
After the plugin is created, a popup will prompt you to connect. Click Sign in with PriceLabs MCP. ChatGPT will redirect you to PriceLabs to complete the authorization flow. Sign in with your PriceLabs credentials and grant authorization.
3. Start using PriceLabs in ChatGPT
Once authorized, PriceLabs MCP tools will be available in your ChatGPT conversations. Test the connection by asking:
Disconnect
To revoke your PriceLabs connection from ChatGPT, use the Disconnect button on the custom client card in Account Settings → AI Connector (MCP). This revokes the OAuth token for your account only — the custom client itself remains available for reconnection.
See Custom Clients → Disconnect a custom client for full details.
Next steps
- Enable MCP for team members — grant MCP access to sub-users
- Explore MCP tools — see the full list of available tools and example prompts