
Connect to n8n Cloud
Connect PriceLabs MCP to n8n Cloud to automate workflows with your PriceLabs data. This guide walks you through creating OAuth credentials, configuring the MCP connection in n8n, and using it in your workflows.
Step 1 - Create MCP OAuth2 credentials in n8n
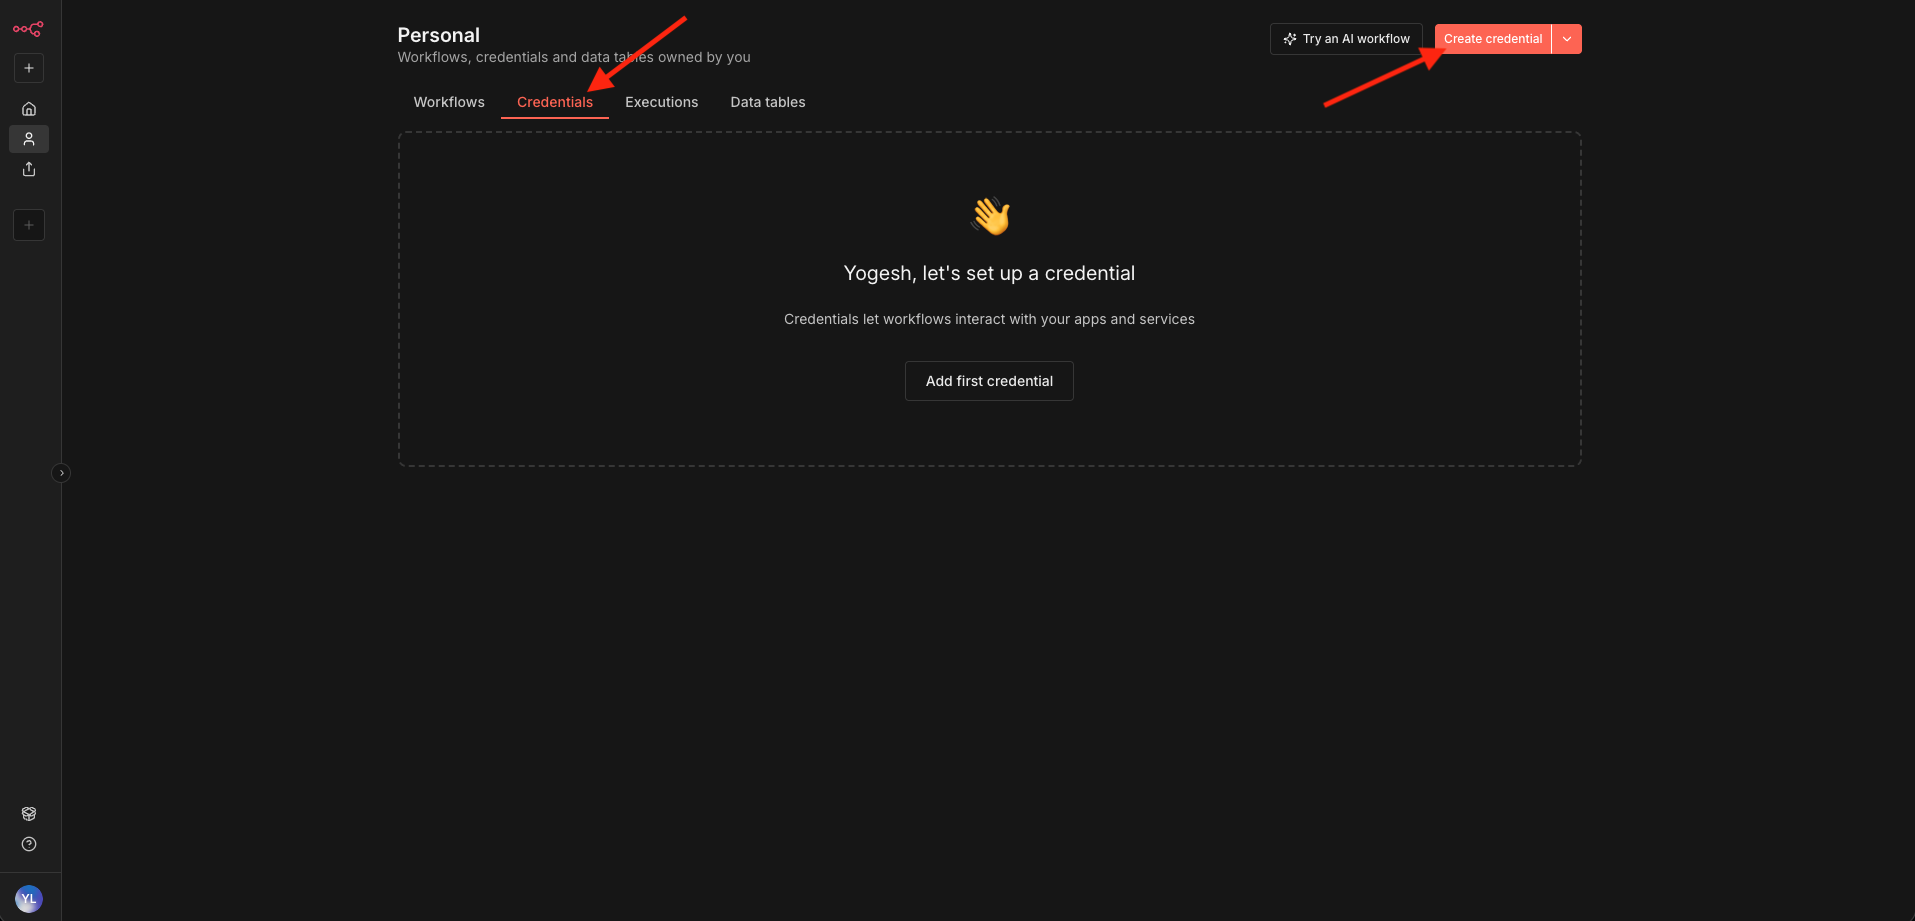
1. Open Credentials
Log into your n8n dashboard and navigate to the Credentials tab. Click Create New Credential.
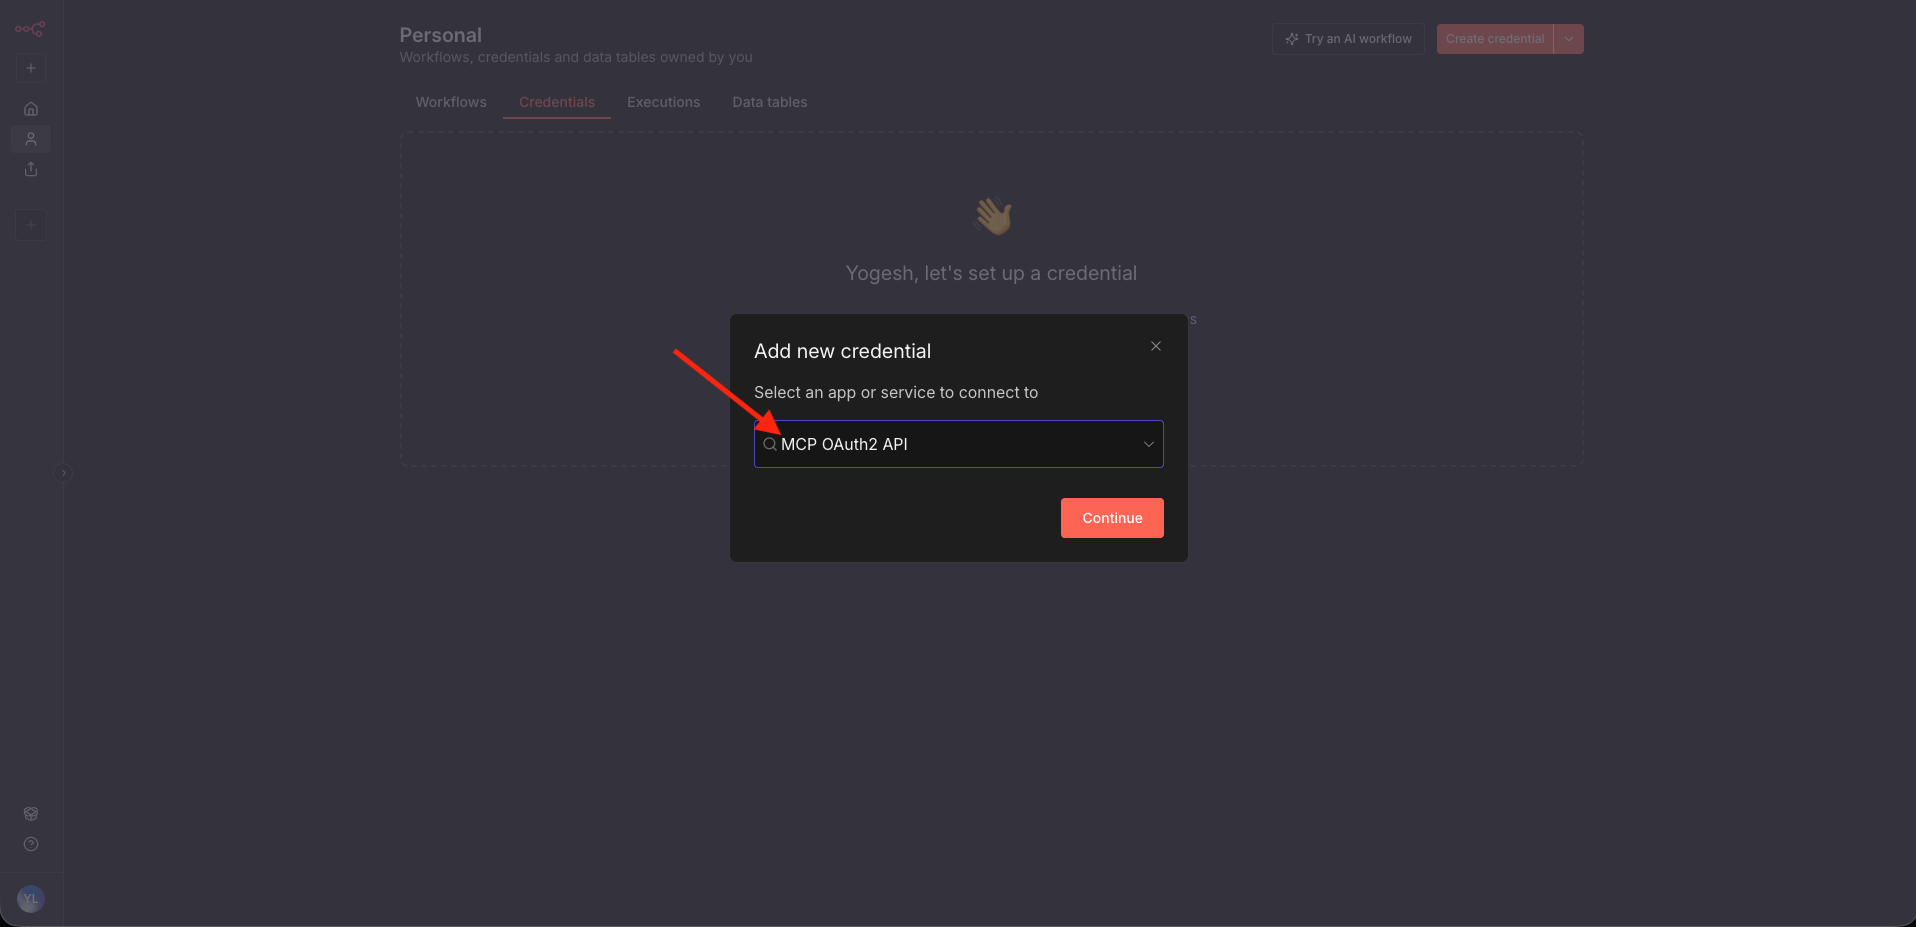
2. Select MCP OAuth2 API
In the Select App or Service to Connect dropdown, search for and select MCP OAuth2 API.
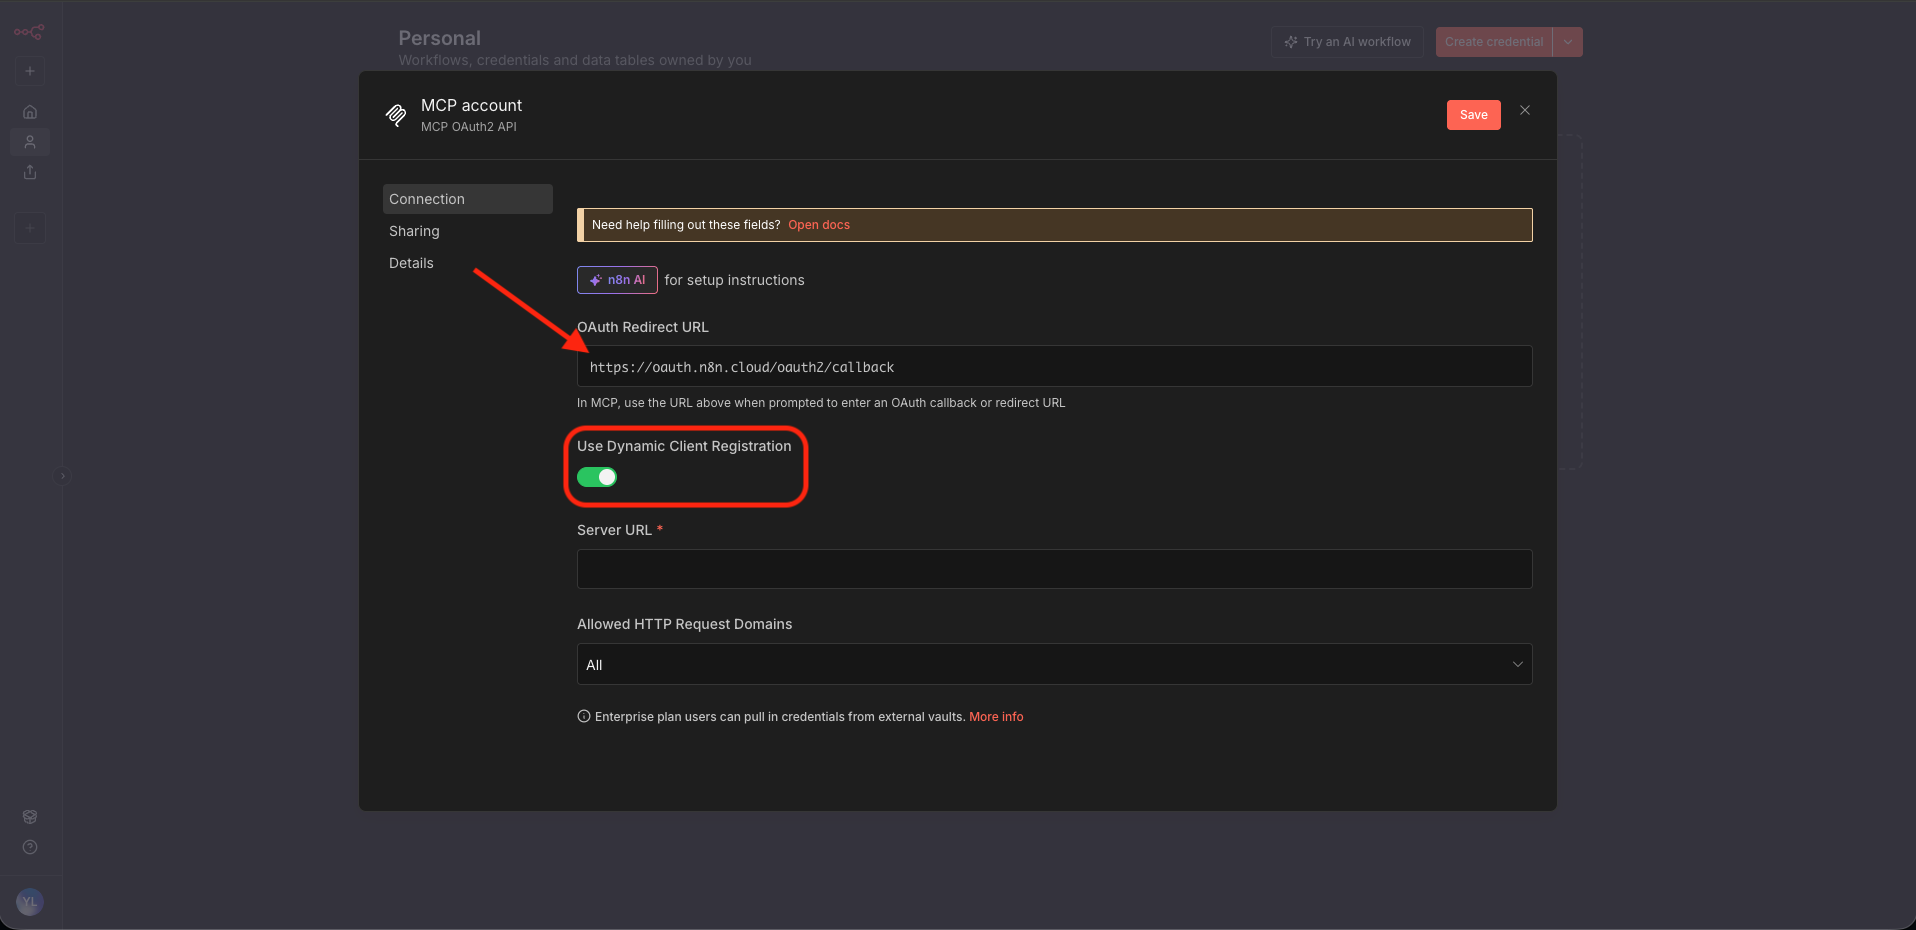
3. Copy the callback URL and disable Dynamic Client Registration
In the credential configuration popup:
- Copy the Callback URL shown at the top - you will need it to create a custom client in PriceLabs.
- Turn off the Use Dynamic Client Registration toggle.
Step 2 - Create a custom client in PriceLabs
1. Open MCP settings
Sign in to PriceLabs and navigate to Account Settings → AI Connector (MCP).
2. Add a custom connector
In the Custom Connectors section, click + Add Custom Connector.
3. Enter details
Click Add Custom Client to create the custom client.
4. Save your credentials
PriceLabs will display a Client ID and Client Secret. Copy both immediately.
The Client Secret is shown only once and cannot be retrieved again. Store both values securely before closing the dialog.
For detailed steps on creating the custom client, see Custom Clients → Add a custom client.
Step 3 - Complete OAuth setup in n8n
1. Configure the credential
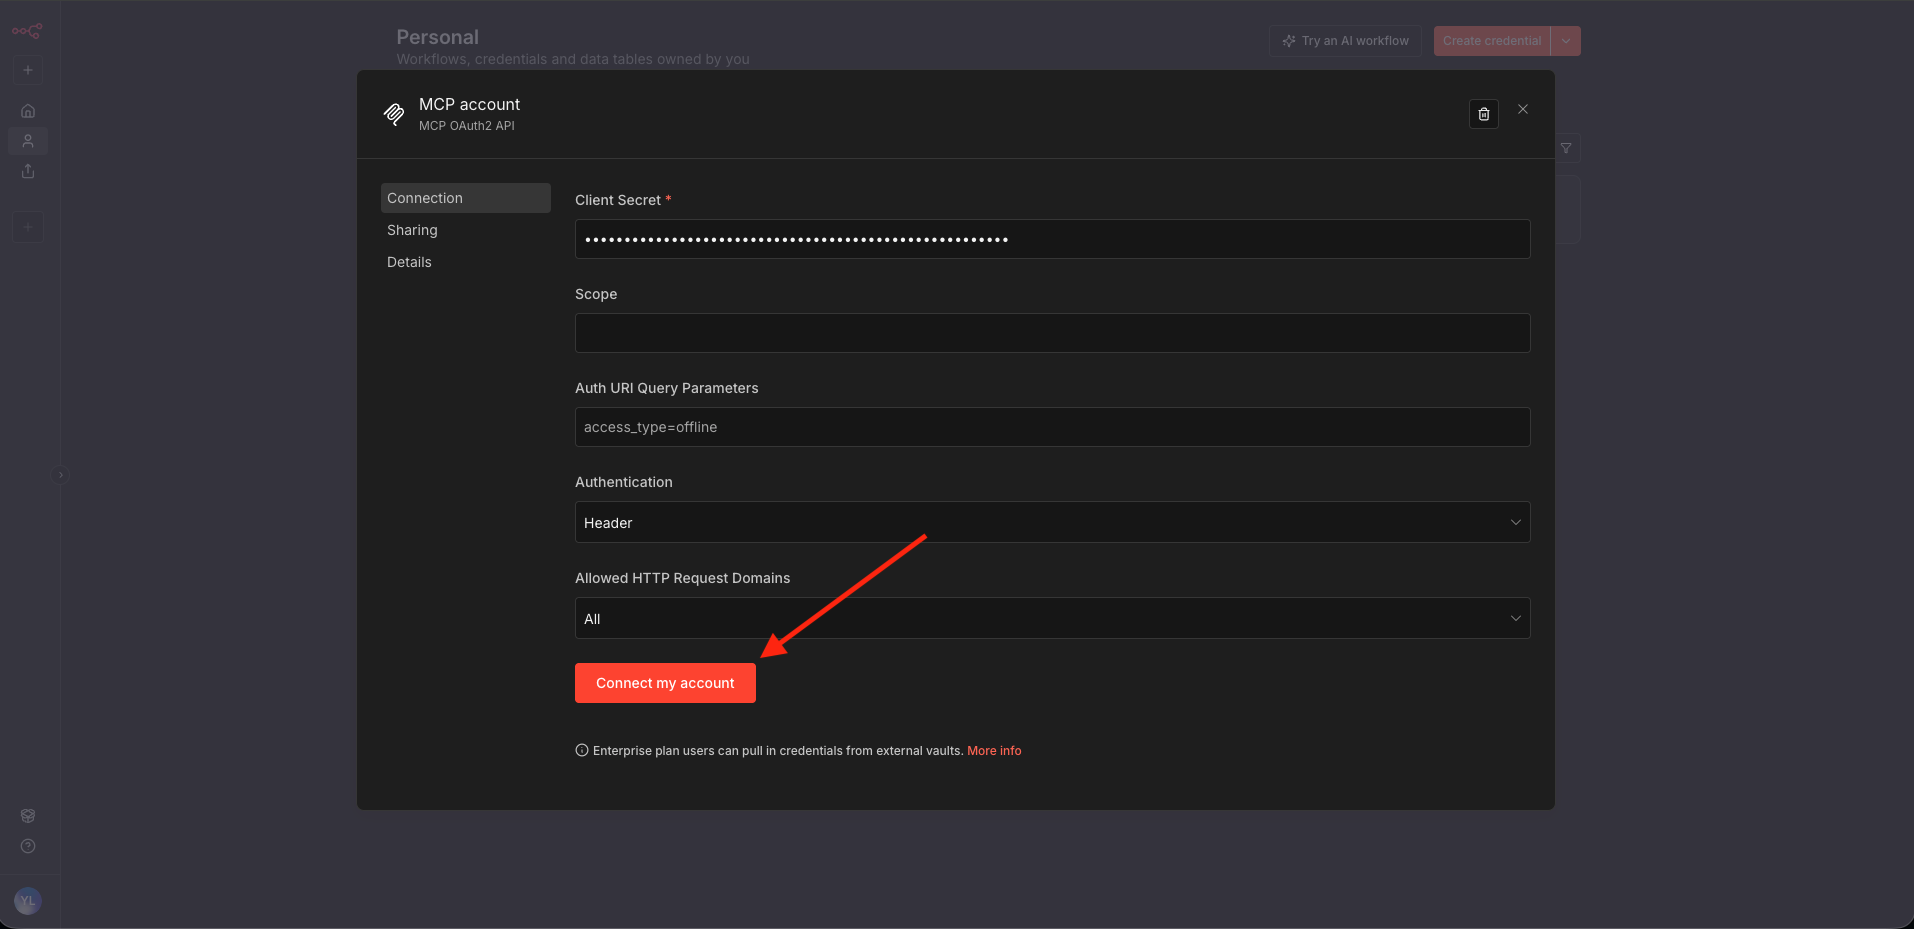
Go back to the n8n credential configuration. With the Use Dynamic Client Registration toggle off, fill in the following:
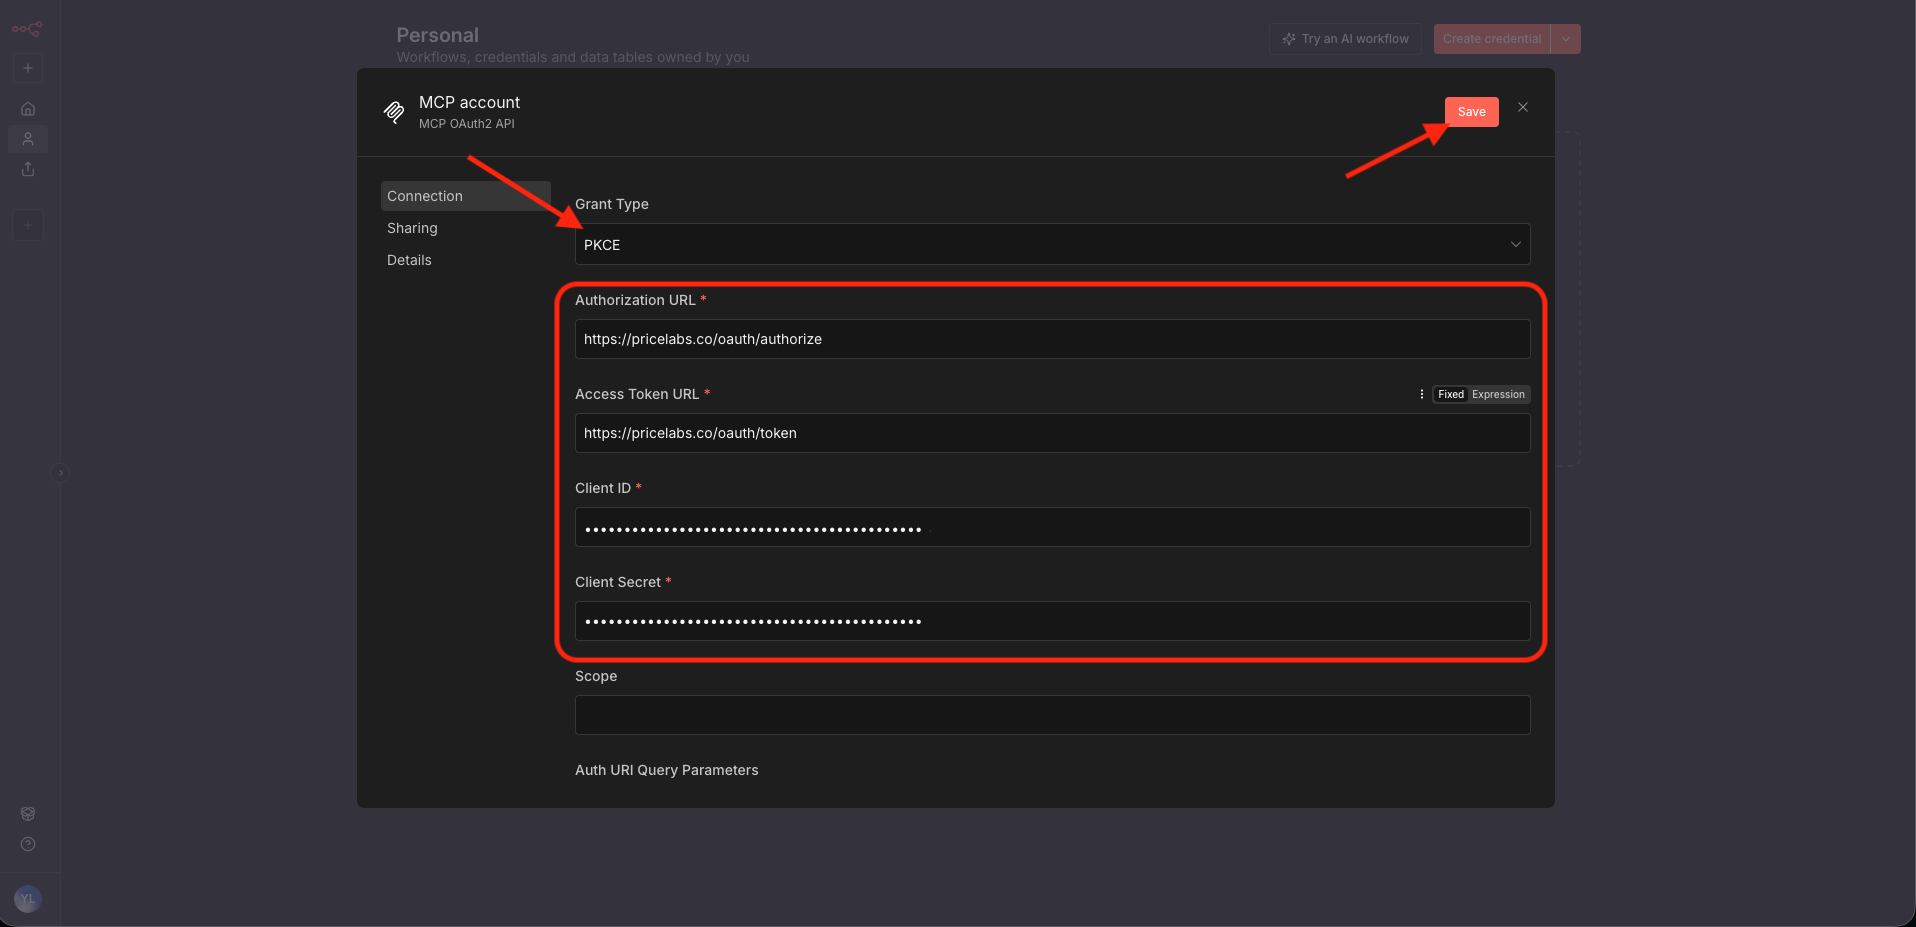
2. Save and connect
Click Save to store the credential. Then click Connect my account to initiate the OAuth flow. n8n will redirect you to PriceLabs - sign in with your PriceLabs credentials and grant authorization.
Step 4 - Use PriceLabs MCP in a workflow
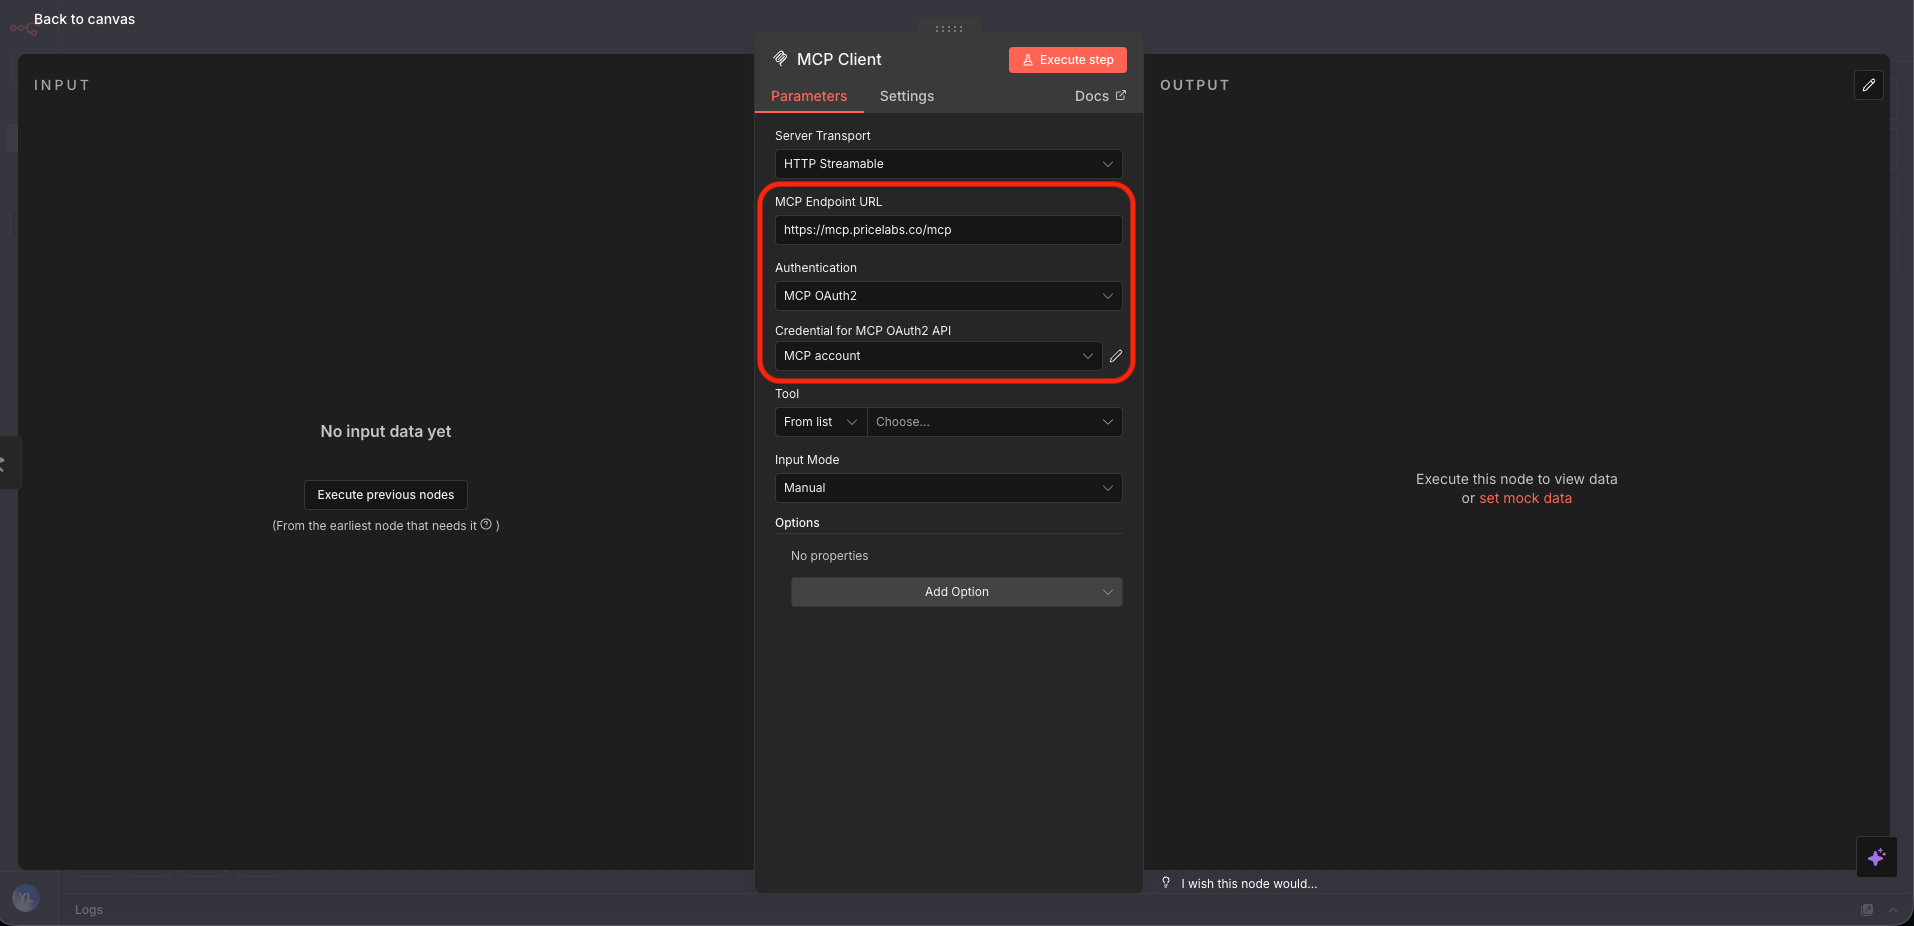
Once the credential is saved and connected, you can use PriceLabs MCP in any n8n workflow step.
- Add a new step to your workflow (or edit an existing one).
- Set the MCP Endpoint URL to
https://mcp.pricelabs.co/mcp. - Set the Authentication to MCP OAuth2 and select the credential you just created.
You can now build automations that query your PriceLabs listings, analyze pricing data, manage overrides, and more - all within your n8n workflows.
Disconnect
To revoke your PriceLabs connection from n8n, use the Disconnect button on the custom client card in Account Settings → AI Connector (MCP). This revokes the OAuth token for your account only — the custom client itself remains available for reconnection.
See Custom Clients → Disconnect a custom client for full details.
Next steps
- Explore MCP tools — see the full list of available tools and example prompts
- Custom Clients — manage, regenerate, or delete custom connectors
- Enable MCP for team members — grant MCP access to sub-users